My kids are now officially ready for Trick or Treating! Alexa is going to be Strawberry Shortcake and Ethan is going to be Spiderman (Hopefully, he doesn't like costumes). I thought about making their costumes this year, but really it was just a fleeting thought. Maybe next year. Maybe. So I felt inclined to make them bags. I made Alexa a cute strawberry ruffle bag and Ethan a pumpkin bag. Okay seriously get ready for picture overload! I am doing both bags in one tutorial because I made them with the same steps, just different shapes. Feel free to just scroll down.
I did the strawbery bag first and had every intention of doing the pumpkin bag today, but when Ethan saw his sister's bag he said "Make my bag!" Seriously he did. I couldn't say no. Could you say no to that cute face?! I think not! His bag was actually pretty fast to make. The strawberry bag however took about 2 1/2 hours. Darn ruffles!
Supplies for strawberry bag
1 yard of pink fleece fabric
3/4 yard green striped fabric
2 yards of tulle ( I bought 4 just in case. Didn't use even the full 2 yards. Oh well)
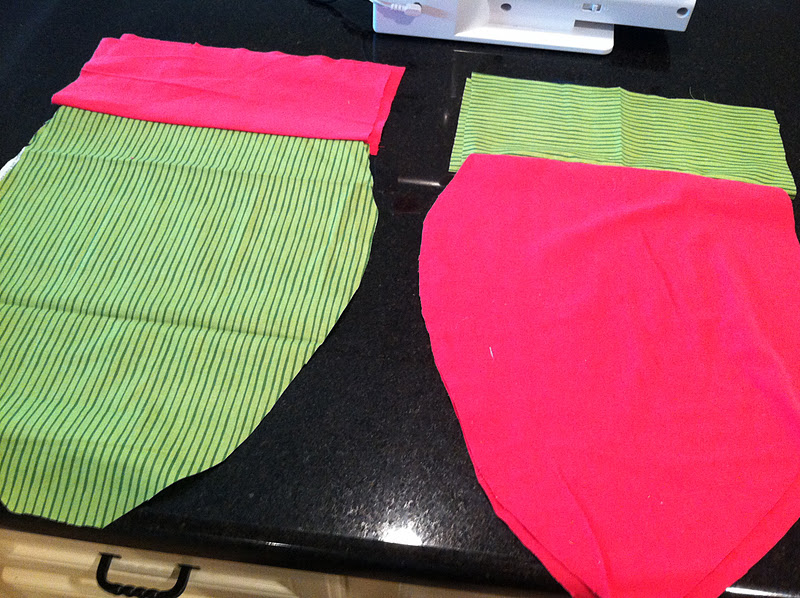
Cut out two (of each) strawberry shapes in both the pink and green fabrics
Measure the top and cut out 2 (of each fabrics) a rectangular shape
Cut four strips of the pink in what's left over of the pink fabric.
Attach the green rectangle to the pink strawberry for both pieces
Do it for the green strawberry too
Now sew a tube out of the stripes of fabric and turn right side out.
Cut 6 strips of tulle that are about 12 inches thick and three times the width of the widest point of the strawbery. Fold over and do a long stitch, pull the top stitching to "ruffle" the fabric.
Attach to top of pink strawberry right below the green portion.
Repeat, repeat, repeat, why do I love ruffles so much! They take forever!
Now have both pink pieces facing each other right sides and pin the edges to be sewn. Tuck in tulle as you pin.
Flip right side out! Almost there!
sew inside portion together with right sides facing each other. sew around the edges EXCEPT do NOT sew the bottom. This is where you will pull the bage through.
See! DON'T sew bottom ;)
keep inside of bag inside out and stuff the outside of bag in it. So both of the right sides are facing each other. Get it?
Now put straps in there and pin them down. Sew along the outside top portion. Now pull the bag through where you left the hole on the bottom. Sew up the hole now and stuff the inside of the bag inside the bag. You are done! yay!
You are going to use the same steps for the pumpkin bag, But different shapes and no ruffles!
I cut out pieces of black felt and sewed it on before I put the bag together.
Strawberry's Bag:
Spiderman's pumpkin bag (He actually clapped his hands when It was done. So worth it!)
He is ready to go!
Sorry such a long post!
Hope everyone has a great Halloween!
Michelle
![]()


![]()
<


4 comments:
Oh I LOOOOVE the ruffles on the strawberry bag! These pretty bags put my ghetto trick-or-treat pillowcases to shame!! Hahaha! And look at Ethan being the perfect bag model. With his kinda talent, you should be able to open your own bag shop and make lots of $$$$ :D
Such cute bags! No wonder the kids love them. And I know what you mean, seeing their reaction makes all the time and effort so worth it when you make them something. Would you share these here?
http://oneartmama.blogspot.com/2011/10/falling-for-crafts-challenge-7-holiday.html
Ummmm...I totally needed that strawberry bag! Cute. What a fun idea. You are full of them!
I have never stitched bags for my kids but we used to decorate white paper giftbags. Now they use old pillow cases ..maybe the older kids believe their loot will be larger, I think! Yours are very cute and will be enjoyed for many halloweens.
Post a Comment