


I decided to build the shelves myself and have it cut to my specific length. This project was actually pretty easy. I think the hardest part was securing the brackets in place.
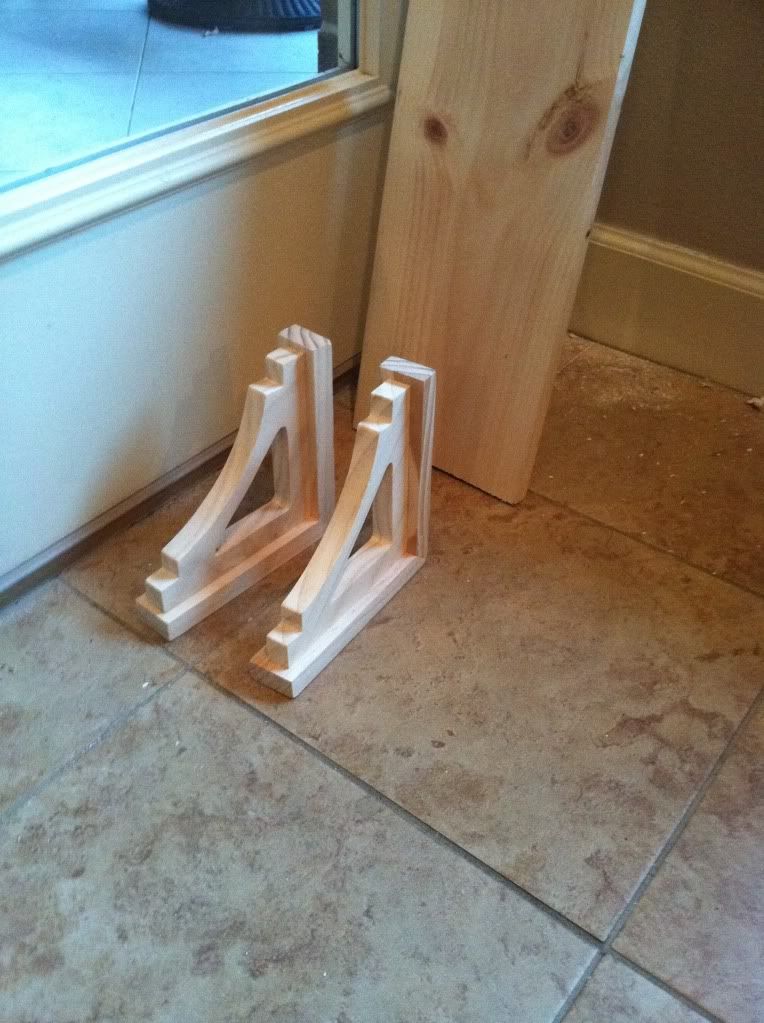
This is what you need:
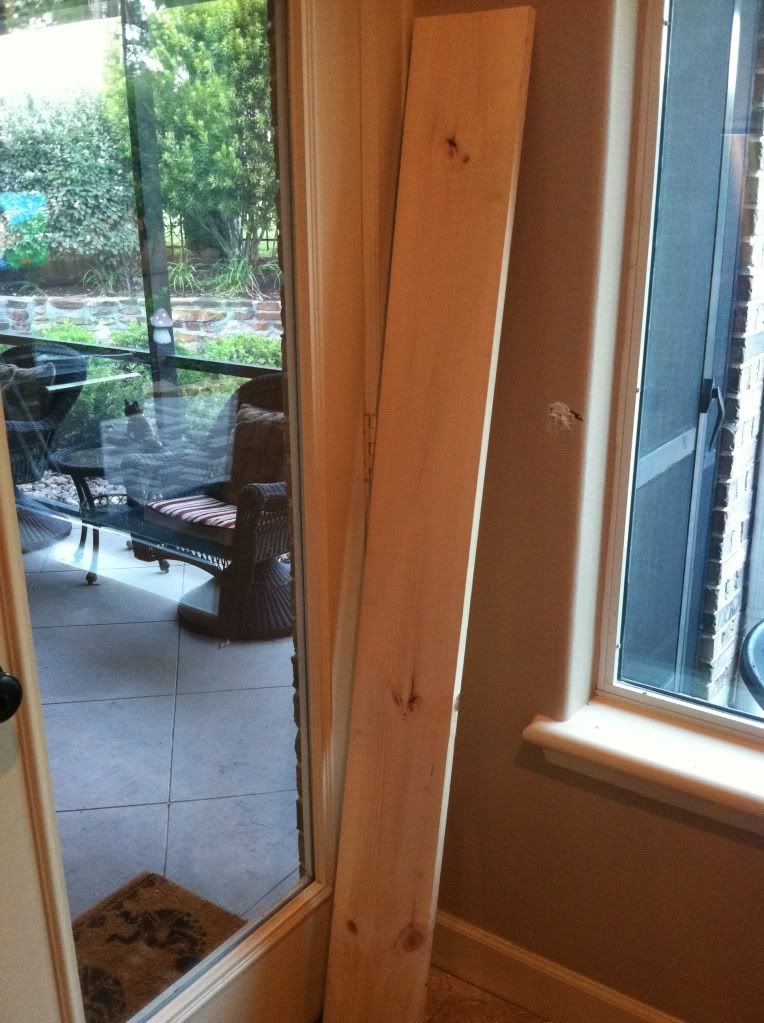
a piece of wood cut to the length you want it (Mine was 66 inches long and 8 inches wide)
2 brackets for each board
a wooden dowel (thick one, I believe mine is an inch thick)
screws
a drill
Paint to match your trim
I got all this at lowes and they even cut the boards for me to my size. I didn't have them cut the dowels, my husband did that, but I'm sure they would cut your dowel to size too.
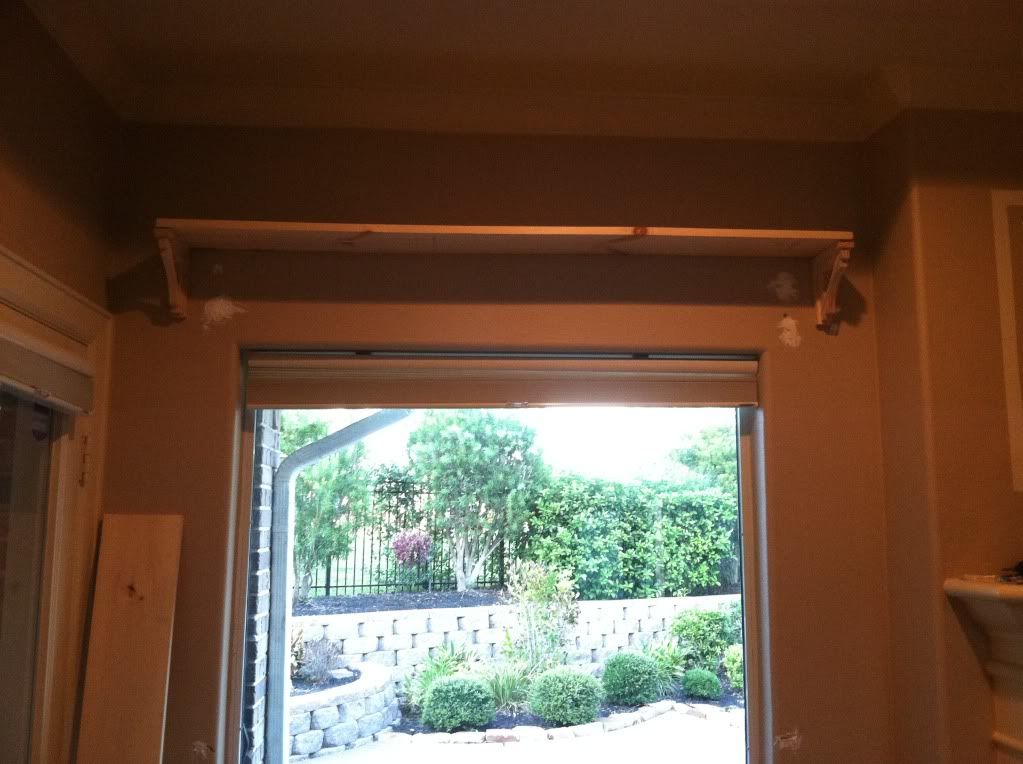
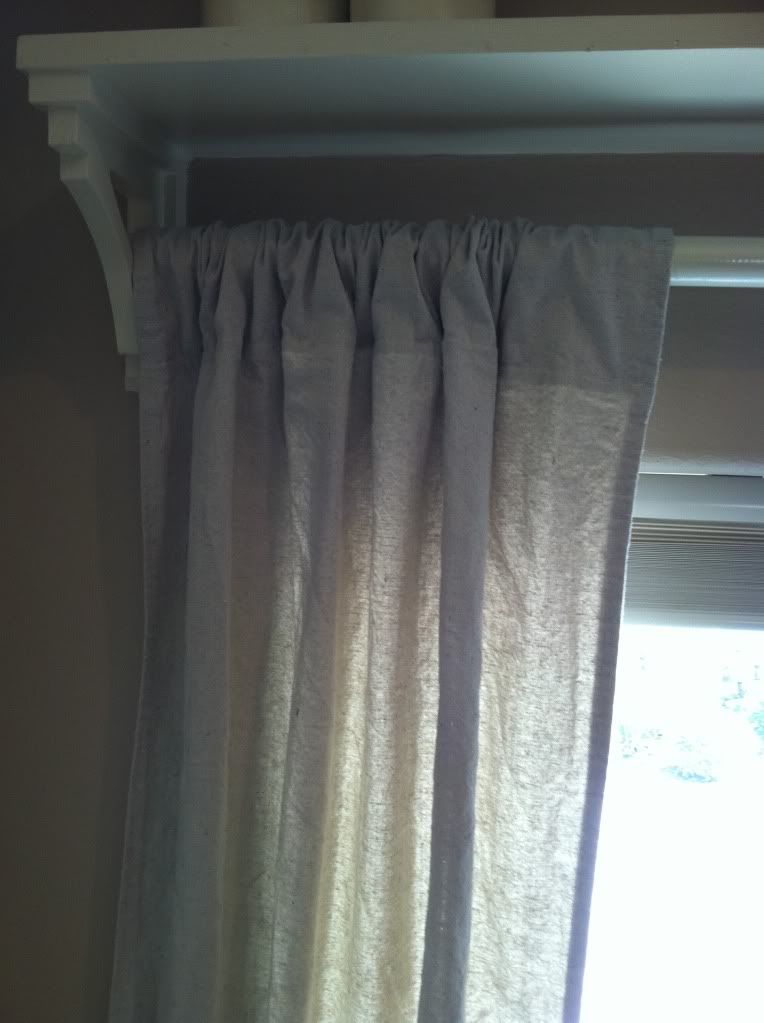
My husband measured out where the middle of the window was and centered the brackets on both sides. Make sure the screws are pretty secure in the wall. Then we placed the board on top of the brackets. After we took it down and my husband screwed the brackets into the board. Making it a secure shelf.
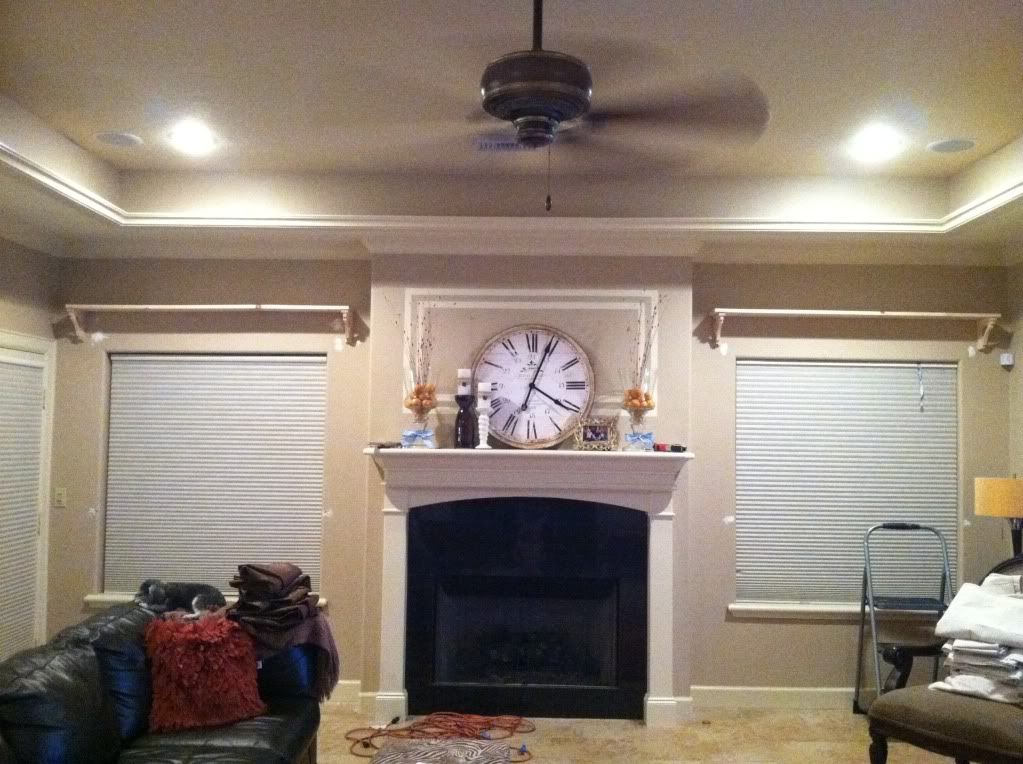
My husband then caulked the shelves into place, to make it even more secure. Remember you are going to be putting decorations on this, so we wouldn't want it to fall on any heads would we? Notice all the putty on the wall? Yeah we were having a hard time securing screws in. Oops!
Next I painted the shelves on the wall with the same oil based enamel that our trim is painted. Thus giving it a more custom look, in my opinion. This part is not fun. Oil based enamel takes FOREVA to dry! Ugh! Patience isn't my fortay, at least when it comes to projects. I then took the dowel rods and painted them seperately. Then finally the next day was able to hang curtains and add decor:


This turned out so good that I will be doing it in my kitchen in the very near future!
Michelle
Check out where I Party

16 comments:
That is a FABULOUS idea! I think I must try this in my living rooM!
great idea, and it looks terrific!
I love this idea! And it has such a great impact on the lighting of your family room now. We finally got rid of our plastic blinds too and got curtains. They make such a huge difference. But I love your idea of having shelves. It looks amazing & I love the material of the curtains!
so cool and functional! thanks for sharing
This project turned out so well. I might have to copy it for the kitchen. I love how you got additional storage on top too...Christine
That would look awesome in your kithcen! It would tie the two rooms together perfectly. I love all of your windows on the back of your house.
WOW! That looks really good! What a fantastic idea!
I love this! I pinned something similar, but had no idea how to do it. Thanks for the tutorial!
I love it - this would be PERFECT in a kitchen!
Brilliant! They frame your new drapes perfectly! Thanks for linking up at WWC!
Most of us need extra room for showing off our collectibles,this is a perfect way to do just that.Beautiful!
http://trescherechattel.blogspot.com/
this is such a great idea!! Definitely on my to-do list! i'm pinning it!!! :)
Awesome idea! I pinned something similar, but I'm so greatful for your tutorial! Come visit my blog and see if mine turns out as well as yours!!!
-Shara@Palmettos and Pigtails
Soooo . . . an inquiring mind wants to know . . . how the heck did you get the curtain rods to stay? I'm guessing you didn't just set them in the brackets. Do tell! :o)
I just did this project and I am in LOVE! THANK YOU! YOU'RE AMAZING! So simple and doable!
Love this idea, did you put any ends to the rod so it won't slip off. Thanks
Post a Comment