


As you know (or if this is your first time here, you may not know) I am in the process of re-decorating my kitchen. I'm going to paint the walls a deep aqua with cream and red accents. I think it will look so marvelous together! I can't wait until the finished product. Right now I am enjoying all the little projects that I'm doing to make it all come together. This project was one of my favorites so far (my husband even chipped in at the end, LOVE that!). I got the idea of this sign from Shabby Chic Cottage . I tweaked the idea a bit (and the process) to make it my own. Here is the fabulous end result ( I will explain how to do it below the photo):
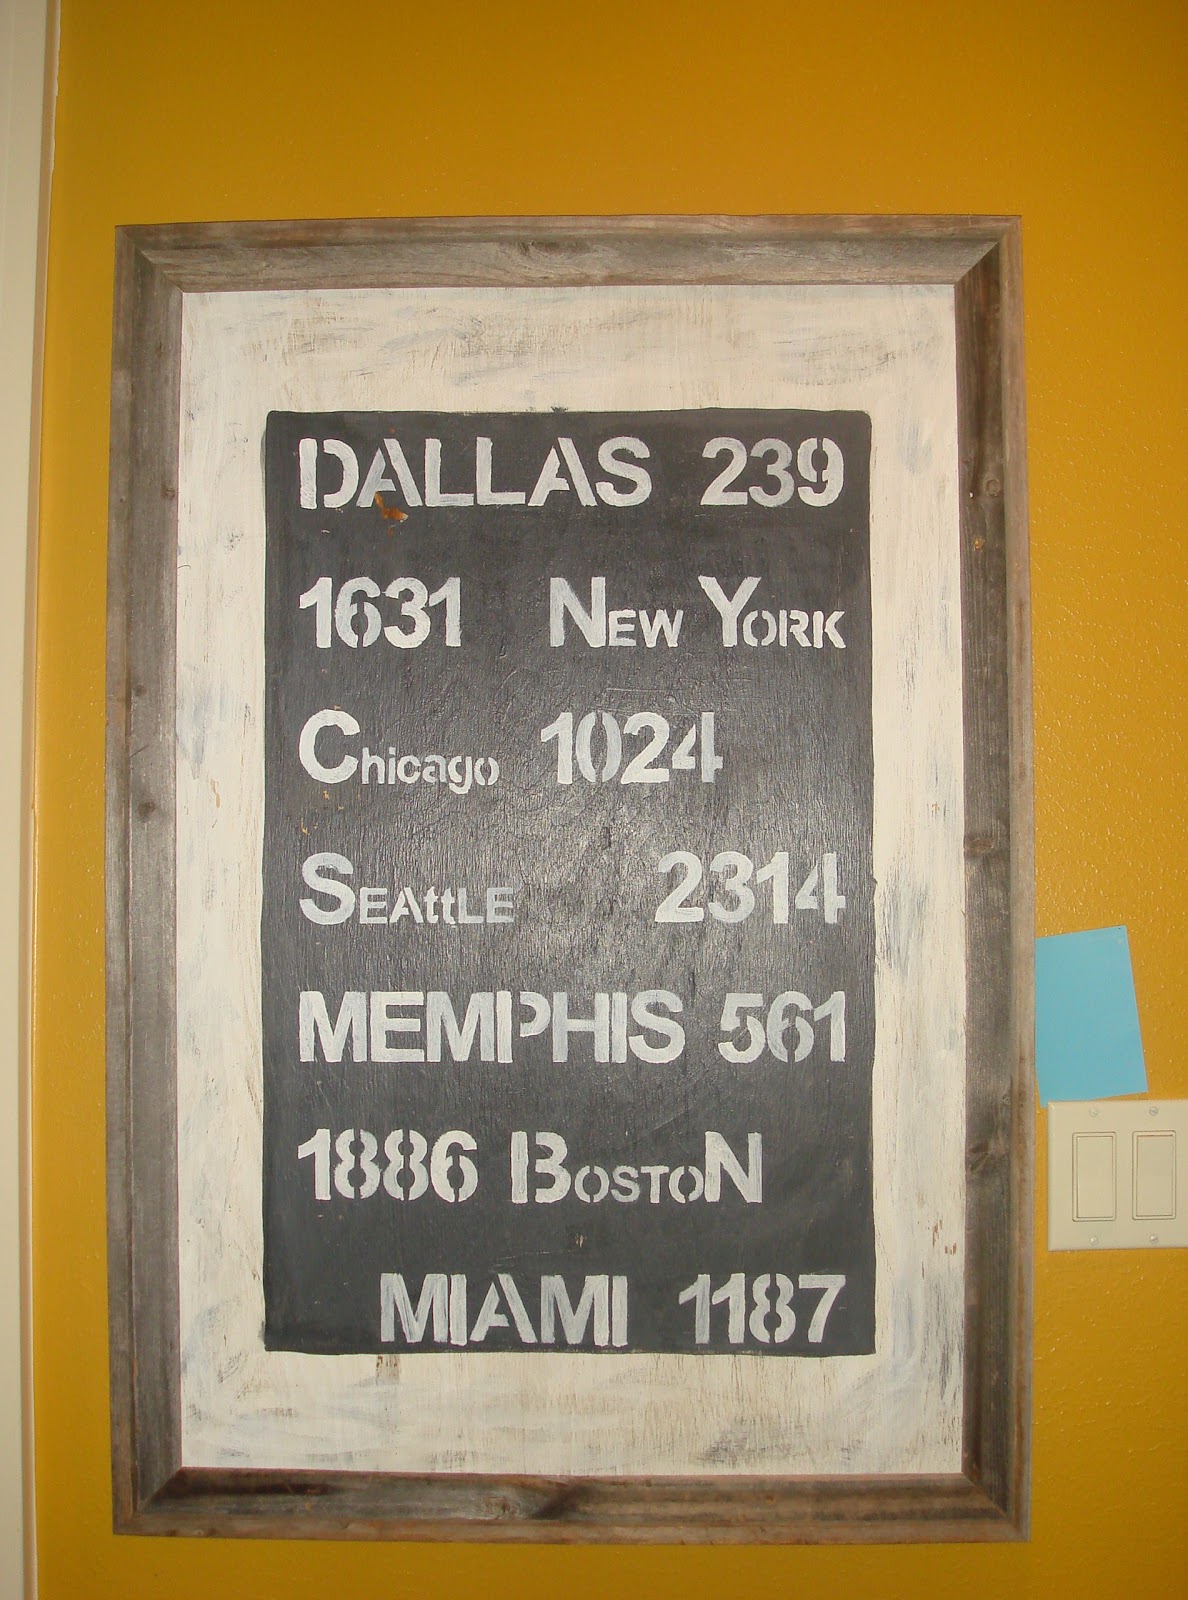
I first got a piece of plywood cut at lowes 2x4 (24x36in). I then went to Hobby Lobby and bought an open back frame (50 percent off of course) with an opening of 24inx36in. To paint the plywood, first paint the whole piece white, let it dry (Which is seriously the hardest part for me, at one point I was blowing on it, as if that would really make it dry faster! ha!) When its FINALLY dry give it a light sanding. Then measure out the center piece and make a rectangle. Paint that black but mix in a little white to give it a more chalkboard look. Just a couple dabs will do. Then let it dry AGAIN (ugghhhh I hate waiting)! I then used two different size stencils to do the city names and the miles. As you can see I mixed up the different sizes throughout the whole thing. I used painters tape to keep the lines and spaces between them straight (this is where my very helpful husband pitched in) we taped off seven sections evenly, leaving a one inch space at the top and bottom. I looked up on maqquest the exact distance from the city named from our home. When stencils are finished I mounted the plywood to the open back frame by stapling it to the back. The end result is a perfect addition to my almost updated kitchen! (Check out total kitchen update HERE)
Michelle
Check out where I like to party
9 comments:
Forgot to mention the cost of this project was only $24!
How cool is that? Can't wait to see your completed kitchen!
Great Job!!! Love this idea!
Waiting for the paint to dry is always the most difficult part! Great project!! Thanks for linking up at WWC!
This looks terrific.Thanks for sharing.I do so love these but simply don't have the gumption to do one on my own.Enjoy.
You did a fantastic job!! I love it.
Kathy
That is a beautiful stool! You are so brave to reupholster.
Visiting from Knock off Decor and I'm your newest fan!
You are very talented. Along with one other girl, there were only 2 of us who did woodwork at school and i thoroughly enjoyed it. What a brilliant creation for you to admire and be proud of.
Found you on the Wednesday blog hop.
CJ xx
Love your blog! You are very
talented!
I'm following from the blog hop.
I'd love a follow back at www.mikaspantry.blogspot.com
Thanks,
Mika
Post a Comment