Thursday, June 30, 2011

A restraining order perhaps?

On myself, from my desserts board on Pinterest. Seriously people I have a problem. Can you block yourself from a certain site on the internet (seeing as I obviously have no self control).  Last week I made some chocolate chip cookies stuffed with oreos. Yes you heard me right.  I gave a bunch away to neighbors and then made my husband take some to work. They were ridiculous! Two cookies in one:

Find the recipe at Picky Palate

Then this week I made some homemade caramel delight girl scout cookies. Oh yum! The cookie plain was amazing:

Find the recipe at Baking Bites

I started off just pinning to a recipes board and now my desserts have a whole board of their own. I think I have a little over 25 desserts pinned. They all just look so lovely. I either need to start getting invited to a bunch of parties or making my neighbors some weekly goodies. I just love to bake.

Any who, I have a little sneak peak for what I have been working on (that isn't related to immense amounts of sugar):

Can't wait to get this beauty finished. She has been sitting in my garage for 6 months because I am a slacker I have been so busy ;)  Hopefully the outside will be finished today.

Michelle

Tuesday, June 28, 2011

A diaper bag tutorial

I have totally been slacking on my blog since summer has started. I attribute this to several things. One: my back up computer that I have been using is really slooooowwwwww. Two: My camera cords are still to be found and emailing photos from my phone and downloading them to my computer is even slooowwwwerrrr (just took me 30 mins to email and download all the pics to this post). Three: I have been totally consumed by my kids (ok I am always consumed by my kids. They are my world. Just sounded good). Four: I may have to go to pinning annonymous. I am obsessed people! I feel the need to pin several times a day and yes I even do it from my phone. I am hoping it is just because it's new and I will lose interest before an intervention is needed :) So the point of all this, I hope you enjoy the posts that I do, even if it's only two or three times a week instead of everyday.

On to the tutorial. I just love how this bag turned out. My sister is having twins in October, a boy and a girl. I am so excited for her. A little jealous too, I am feeling ready for another baby ;) Any who since I am now a pro at making bags, see HERE and HERE, I thought I would make her a one of a kind bag.


You are going to need:
1 yard of fabric for outside
1 yard of coordinating fabric for lining and details
coordinating thread
2 yards of ric rac
One package of medium weight fusible interfacing
one extremely cute button
1/4 inch elastic

Here is what you will need to cut out in both fabrics (the front and backs of purse measure 15in in width and 13 inch in height. The sides are 5 inch in width and 13 inch in height. The bottom piece is 5 inch in width and 13 inch in height. For the straps just play with how long you want them, one strap should be about 4 inches longer than the other)

 Now put all four of the front and back pieces together and cut about 5 inches off the tops and sew opposite pieces on each other:
 For the outside pieces, take ric rac and sew a straight stitch down the middle.
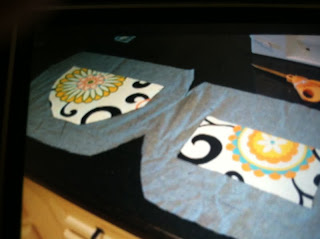
Now cut a large trianlge that is slightly bigger than the purse in both fabrics. Make a pocket by sewing pieces together inside out. Then flip to the right side and iron flat. You should have a piece that is lined in the coordinating fabric.
 Sew a straight stitch down the middle. Make sure to back stitch several times. This is an outside pocket that I am sure will get lots of use. I don't have a pic of the next part, but do a zig zag stitch around the bottom portion of the purse to sew pocket into place. Trim excess fabric.


Onto the pockets on the sides. You will cut four pieces of fabric that are 8in by 8in. Make a pocket by sewing inside out on three corners. Flip to right side and fold unhemmed edges under and make a casing for elastic. Sew around the whole thing leaving an opening for elastic. Put elastic through by attaching a safety pin to the end. Now sew both ends of fabric together. Sew ric rac on the top. Now sew two sides and bottom to side piece of purse. Repeat on other side. If that was confusing please email me with any questions :)


Now attach all pieces together inside out and sew a zig zag stitch around all edges.


Attach fusible interfacing per directions on package to all pieces of lining fabric.


 Now the lining. Cut out two large pieces for the pocket. One in each fabric. I did one about the length of the purse and made them pretty deep. Sew coordinating fabrics together inside out, except for top edge. Turn right side. Iron flat. fold top pieces under and sew a straight stitch. attach ric rac to cover seam. Do a straight stitch down the ric rac to hold in place. Now do a zig zag stitch around the edges and bottom of pocket to apply to lining of bag. After, I did two stitches down the pocket to make three pockets. Be sure to back stitch back stitch back stitch. Remember there will be lots of baby stuff going in and out of these.
 Now you are going to attach all pieces togeth just like you did for the outside of the purse. Except you are NOT going to sew one portion of the bottom of lining. See pic above. You will see later on why.

 Now allign both outer and inner pieces together with pockets facing each other on the inside. Do a zig zag stitch on the front and back of the bag. Leaving the sides unhemmed. This is where your straps will go. Now remember the hole on the bottom of the lining? Turn bag right side by flippping purse through that hole. Stitch up the hole and stuff lining in bag.

Now take the strap pieces and sew along the edges
 PLeat in the middle of the straps by folding corners in slightly. pin in place.
Now insert straps into the opening on the sides you left:
 Do a zig zag stitch along the edge and back stitch several times.

Now enjoy the fact you have finished your very own one of a kind diaper bag. Keep it or give it away as a lovely baby shower gift.
 Notice the knotted strap on the top. I love this! You can tie it longer or shorter to make the bag the length you want it. I have seen this done several times, but I got the idea of it from HERE.
 Love the V pocket in the front. I got the idea of that from HERE
 Loving all the storage in this bag!
 I am so happy with the fact you can't see any stitch lines on this bag except for where the straps are. This makes the bag look very professional. I have come so far in my sewing. I really am so proud of myself, as corny as that sounds :)
 Stay tuned to see what I am going to make to put in the bag! It will be fun! I may also add something cute to the front of the bag, you will just have to wait and see :)


Michelle

Check out where I party


Thursday, June 23, 2011

When life gives you lemons make brinner....duh

So I was totally going to make a whole roasted chicken tongiht with some steamed broccoli and a possible salad. Sounds oh so yummy and wholesome. Well life got in the way. Ethan was forming this weird rash on his back (which thank goodness turned out to be nothing), so I brought him to the doctors last miniute. Since they charged me about a weeks worth of groceries to tell me to put lotion on it (thanks!), and all I had for meat was a whole chicken, I decided it was a good time for a little brinner. Who doesn't like brinner. It's like an excuse to eat bad at night for no reason at all. You can't fight that. Being that I totally despise fake maple syrup, and I was all out of real maple syrup, I decided to make a little topping of my own.

Banana nut syrup:
1 whole banana
2 tablespoons of brown sugar
2 tablespoons of chopped pecans
1 1/2 tablespoons of butter


Mix all together in pan over stove. Turn heat to medium. Let cook while you are making your french toast, stirring every so often. You will have an almost liquid substance when you are finished, maybe with a few bits of delish banana.


Put a spoonful over cooked french toast. So yummy! This would be so good on a lot of things. Really people the possibilities are endless. OK maybe not endless, but really over like oatmeal, pancakes,waffles, plain yogurt...Those things would be good.

Enjoy!


Michelle

Wednesday, June 22, 2011

Dear thrift stores: you suck!

Just saying. Alright I have a love hate relationship with you. Sometimes I find glorious things and I praise you. Other times I walk in look around and roll my eyes at the fact that you have a rusted candle holder marked at 19.99. Really?!? Who are pricing your things?! I think there may be hoarders working for you that secretly can't handle selling anything (not to take the hoarding disease lightly, seriously very sad).

So I set off today to try to find a chair to go in my entry way. Remember that post HERE. I have the fabric picked out at Jo-anns and I know exactly how I am going to make a pillow for this chair. Unfortunately, I can't find it :(  Oh well. Guess I will have to go on Craigslist.

Check out some great eye candy I saw at a local antique mall today though:

I love this clock, but really I could buy you for 24.99 at Hobby Lobby with a 50% off coupon.
 I really love the two tone effect on this cabinet and the shape of it is gorgeous.
 LOVE this ladder. This is so versatile. I could see it hanging in the laudry room or leaning on a dining room wall or even leaning on top of a cabinet. Just think of all the things you could hang from it too. Lovely piece!
 Really Like the white wash on this piece. It brings out all the detail. Definitely filing this away as a must do to something in the future.
 OK this piece I am in complete and utter L-O-V-E love with. Seriously I am feeling butterflies and I just can't seem to get her off my mind. I am staring longingly at this picture as I type. If that's not love I don't know what is. Sadly she is WAY over priced. Someday apothecary cabinet I will find you for a steal and you shall be mine. Sigh.......

I went to five different stores today and bought........Nothing. Ugh! Where are you chair that so desperately needs some tender love and care?

Michelle

Monday, June 20, 2011

I think I need an assistant!

Maybe just for the week. Is there like a hotline for temporary assistants? They also have to work for the pure joy of being around me and my kids because I doubt I could actually afford their real pay. Let a girl dream OK?

So being a stay at home mom or just a mom for that matter, we can't ever get sick and definitely can not get injured. If we do (when we finally do get ourselves out of bed), we find our living room looking like this:


Yep that's what I walked into today! Am I sick you ask? No, I wish I had a cold or even the flu sounds more enticing than this. I pulled something in my lower back this weekend. AWESOME! So I have been suped up on Ibuprofen and Icey hot all day. I know it's just too exciting.  It basically hurts to move. You know what stinks more than having a messy house? I probably won't be able to workout all week. This is like a lifetime to me!

I am so thankful that my daughter is so much older than my youngest. She has helped me out so much today. Another up side is Ethan has given me like a million kisses. Saying "back hurt?" then "better?" after he kisses me. Aww! Thankful for the two cutest, sweetest kids ever! I guess they make up for the fact my butt is basically going to get huge this week (haha kidding) and my house is trashed. Oh well it will give my husband something to do when he gets home ;)

So what do you do when you are sick/injured??! Any tips or tricks you have for me to make this week a little less "painful"?

Michelle

Thursday, June 16, 2011

A little elegance with stripes

The entry way gives you a little taste of what you can expect the rest of the home to give you. I want to have an elegant, classy, yet cozy entry to my home. Here is what I have so far.

Remember how I was trying to decide how to paint my entry way HERE. Then I decided on stripes HERE and gave you this little sneak peak:

It is finally finished! I am so excited! It turned out amazingly good:


Do you just love it!?!? I do! I am so motivated now to finish decorating the rest of the entry.

Stay tuned to see how I decorate this (the wall across from striped wall)
 Also read along to see the chair I am going to find and re-upholster to go here:


I love the room so far. Can't wait to see it all put together. What do you think so far?


Michelle

Check out where I party

http://cottageandvine.blogspot.com/

Tuesday, June 14, 2011

A purse tutorial...finally

Ok so I still can't find my camera cords any where! Ugh! They never mattered before because my other laptop had a slot where I just put my memory stick in. Unfortunately, my laptop is on the fritz (don't ask!). So I have been using like a six year old laptop, that for some reason doesn't have a slot for a memory stick?!? I will be looking on Ebay today for some new camera cords. Hopefully?!

How am I going to do a tutorial then you ask? Well I took pictures on my phone of the pictures on my camera. I know they are not the best quality pics, but you got to work with what you have right?! Until I get new cords I probably will be using my phone as my camera for crafts and what not.  Alright enough talk. Here is my tutorial for this lovely summer tote:


You are going to need:
A yard of main fabric
3/4 yard of fabric for lining
1/2 yard fabric for ruffles
1 1/2 yards of piping
1/4 yard of fabric to cover piping with
coordinating thread

Cut out four pieces of fabric that measure 14 1/2 inches by 18 1/2 inches. Make sure the sides and bottom are rounded a bit.
 Cut out two pieces (in each fabric) of 6 by 14 1/2 inch strips. Then one piece (in each fabric) of 6 by 11 inch.
 Then you are going to need six strips of fabric to make ruffles with. They are going to measure 30in, 28 in, 20in for the left side of purse. Then 16 in and 12 in for the right side. the width of every strip will be six inches. Ruffle the fabric by folding in half and doing a straight stitch down the side at a high stitch length ( I put mine on 5). Now take the top stitch and pull until the ruffles fit properly on front of purse.
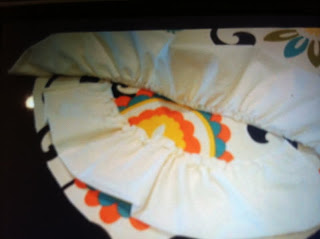
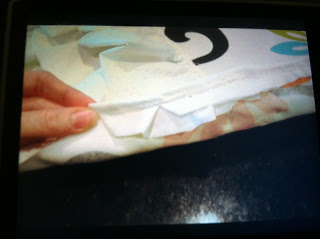
 Take longest strip and sew doing a zig zag on the very edge to stop the ruffles edge from fraying
 Flip up the top ruffle and sew the second ruffle the same way.
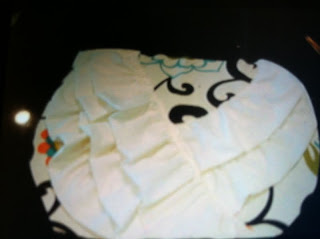
 Then the third
 Now fold edges under and trim. Then sew into place
 Repeat on opposite side with the smaller strips of ruffle

 Now your ruffles are finished
 Attach the sides and bottom together with both front and back pieces. Just follow along the edges and keep it straight. make sure its inside out.
 For the piping cut a strip of piping and fabric that equal the curcumference of the purse top. Should be about 36 inches.
 sew fabric on piping by using a zipper foot and sewing as close to the piping inside the fabric as possible. Now attach to the top of the purse. Make sure the frayed part of the piping is on the inside portion.
 Turn right side
 cut out strips for the straps. You will need four 3 by 34 in strips of fabric for handles. Then four 3 by 6, four 2 by 9, four 4 by 4.
 this is the 3 by 6. you fold the end in and the top parts down. Use an iron to press.
 this is the 2 by 9 flod twice. press, then sew into place.
 take tab on the 3 by 6 piece and fold the 2 by 9 strip under it. sew into place
 Repeat the above process three more times with remaining fabric.

onto the straps. Fold the 3 by 34 strips in half. press with iron.
 Put one piece on top of the other and sew both sides. Repeat for second strap.
 now attach the other portion you made to the strap
 Press 4 by 4 strips with iron and attach both piece together. This will hide any mess. Sew a straight stitch on the bottom and top.

 repeat on other side of strap. Then repeat whole process for othe strap.

Attach to purse by sewing around the whole bottom rectangle. Also sew at the very top of the strap to hold into place. Make sure straps are even on both sides.

 Make pockets for inner lining by cutting out both fabrics. sew around the edges of both pieces inside out until you get to last corner. Turn right way and sew across.
 Attach pieces to purse by doing a zigzag stitch around the bottoms and sides of the pockets. Make sure to backstitch on the ends. You will be tkaing things in and out of those pockets on a daily basis and you want them srong!.
 Make lining into purse form just the way you made outer portion. Now insert into outer portion of purse. Fold in frayed edges and pin inot place.
 Do a straight stitch around the entire top to hold into place.
 Lovely pockets!
I love this purse! I have been using it every day. We have also been going to our community pool every day (because it's been over 100. ugghhh!). This bag has been a great pool bag. It is so roomy and I just love all the storage to keep things in place.

Michelle

Check out where I party