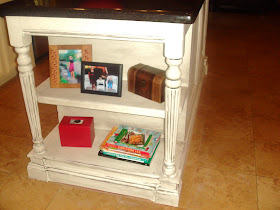
Here is a before pic of my kitchen island:
After lots and lots and lots of sanding. I then primed the entire island, little nooks and crannies everywhere!! Really what was I thinking?? Then sanded AGAIN. ( not to mention the billion times I had to vacuum up the residue).
Here is a pic after the sanding, priming and sanding:
Looks pretty good so far! I still have to paint the whole thing again?? Oh man! I keep telling myself it will be worth it! Well after a lot of painting, sanding (AGAIN), and glazing. My one day project turned in to a four day project, but the results: SO WORTH IT!!
This is just as good, if not better, than the pieces I loved in Tennessee! I'm thinking about adding a glaze with a very light version of the aqua that will be on the walls. We shall see!!
Happy sanding, painting, priming, sanding, painting, sanding, glazing!! (Remember its worth it!!!)
Check out some more highlights of the week at Serenity Now
Michelle


My hat is off to you for the patience you must have had to do all that distressing. It paid off. :) You have a lovely kitchen island now. Thanks so much for sharing your post at my Weekend Bloggy Reading party. If you could please add a link back to me or my party button to your post, I'd appreciate it. Thanks! :)
ReplyDeleteOh wow! That is amazing! I have a dresser for dd that (over a year later) sits and waits for sanding and painting and sanding and painting and all that jazz and I have just not had the umph to do it, thanks for the inspiration!
ReplyDeleteThat looks great! We are so rough on our furniture here that everything always looks distressed:)
ReplyDeleteCame over from Amanda's blog hop. Nice to meet you!
I love the result! I scrolled down through your posts to find the "before." The new finish looks great in your space.
ReplyDeleteWell worth the time to re-do...It looks amazing....
ReplyDeleteTake care,
Lisa
A beautiful look for so much hard work. It looks like a very expensive piece of furniture!
ReplyDeletethat looks so much statelier and classic in its new finish! gorgeous! thanks for linking up!
ReplyDelete